Technique: The Revival of the Outdated Speed Rock on Social Media

The proliferation of Instagram and Youtube shooting sensations has brought with it a disturbing trend. I have noticed that in MANY of the shooting I’ve seen in the 15-60 second cherry picked drills they decide to post, they use the ‘speed rock’ retention position for contact distance shooting. Then they show you their timer to show how quickly they can complete a contact distance drill. This is an oversimplification of the problems that arise in this contact distance situation. I have to set the record straight because people are actually watching this stuff and considering it to still be legitimate technique. Long story short, it’s not.

img_1761

Here’s one IG example so we’re on the same page. Watch his posture as he leans back and back pedals away from the target. Boy howdy, he sure is fast!!! Unfortunately, this is more than a speed shooting problem.

Note: This is nothing against this guy. He's a better shooter than I'll ever be. I just don't want people to think this is viable against a resisting opponent. When you get to initiate a sequence against stationary targets with no free will, ANYTHING will work. Add another human and things get more slippery.

#repost from @truexodus Decided to work with my new @lake_county_knife_and_tool pokey device tonight. Just working a few scenarios in my head. Naturally, when fighting with an opponent with arms and weapons things are a bit different. One of the things people tend to forget is that the bad guy doesn’t know or expect you’re carrying a weapon. So when you decide to act, act quickly and with great violence. Please don’t practice shooting from retention. Remember, I’m not a professional. I’m just a no body preacher trying to develop myself by getting out and using the skills I’ve learned from other professionals to increase the likelihood of my success in a deadly force encounter. #trustandard @rubberdummies @salientarmsinternational @lake_county_knife_and_tool @nevadaammunition @trexarms PS: I don’t care if you don’t like rap.

A video posted by Rubber Dummies (@rubberdummies) on

Here’s the issue…The Speed Rock is a POOR technique!

What is the Speed Rock?

From The Tactical Pistol 1996 “The “speed rock” refined for combative use by Chuck Taylor is a last-option technique for arm’s length situation where there is no room to evade or maneuver. The shooter “rocks” the pistol out of the holster and simultaneously “rocks” his torso back to bring the muzzle onto the adversary’s vital zone”

So, 20 years ago, when folks were still really into the Weaver stance and mullets, this was the state of the art. So why was it a technique worth learning back then? It was the attempt to deal with the obvious real problem of a contact distance fight, in which so many police and citizens find themselves. It was an early beta technique which has evolved to higher percentage techniques. Here is a great article on its history.

It is FAST! You need only clear your duty holster, drop your elbow and bow forward at the hips to bring the muzzle slightly above horizontal, and you can start pressing the trigger as you back away. The more you drop your elbow and sacrifice your base with bowed hips, the more the impact zone will rise on the target. I think this is why the IG-speed shooter guys do it. Showing a timer after a drill like this seems impressive to their ignorant followers. Ignorant, not stupid. I’m trying to educate the ignorant.

Apparently it’s still taught by some very decorated guys from the special operations community. I will remind you that being really good at shooting people with a carbine in a military setting doesn’t necessarily directly translate to a criminal assault at a RedBox in front of a gas station when you’re wearing a subcompact gun under a T-shirt. It’s more than a shooting problem, it should be treated as a combative/grappling problem that happens to include weapons.

That, and Tom Cruise did it in Collateral…

Why it Sucks and You Shouldn’t Practice It


  1. The first and most important issue is the complete sacrifice of athletic base to achieve the position. Hips forward, torso back, weight on heels. Bad. This is the EXACT position you want your opponent to be in when you perform a body lock takedown.
  2. It is demonstrably easier to sustain an impact when in an athletic base (weight on balls of feet, nose over the toes, spine in alignment) than when your weight is on your heels (only people tripping over things backwards do this).
  3. The gun is actually NO FURTHER AWAY than it would have been with good technique. You have sacrificed your mobility and ability to sustain impact for ZERO extra distance. Bad trade.
  4. You can not move backwards faster than someone can charge you.
  5. Pistols suck at stopping people. Question: What does a person do after they are shot? Answer: Whatever they were doing before they got shot. Sacrificing mobility and your base for maybe 2 shots to the lower abdomen before you’re in a grounded gun fight is a bad trade. A motivated attacker will push through you and eat your lunch. Not to mention several attackers.
  6. The upward angle is meant to put rounds into the adversary’s thoracic cavity for a more reliable stop. The problem with this is that a miss at an upward angle means a bullet that can travel extreme distances. To demonstrate my point, watch Aaron Cowan of “Sage Dynamics” advocate stitching the target by breaking the wrist to achieve higher and higher shots. Three problems with this. One, when the other guy is moving, the floaty bent wrist index falls apart and it compromises wrist strength for retention. Two, where would those missed shots land when fired at an upward angle (edit: Aaron’s range is private land and has a large wooded area behind range)? Three, if your other hand is fending or tying the other guy up, you run the risk of shooting yourself in the arms and hands. Shooting yourself in a gunfight still counts.
  7. You’re probably not fast enough to make it work at arm’s length. I’m not. Not from concealment. This technique was designed for people who carry outside the waistband. You will eat so many punches/stabs at arm’s length that the trade isn’t worth it. You need to deal with the adversary’s forward drive and strikes FIRST. Then you get to shoot him.
  8. Since we understand the criminal assault paradigm, we realize that we likely will be engaged in some verbal judo with our adversary as he tries to close distance and find the opportunity to launch his ambush. This will create a cognitive load which WILL slow down our reaction time. So by the time you clear leather, he’s on you and you’re on the ground with your gun out. Bad trade.
  9. You’ll likely not initiate the shooting whether police or citizen. He/They will make the first move. You’ll likely be reactionary. This is the way of things when you’re the good guy. There are ways to spot pre-assault cues which will clue you in that something is about to happen, but good people have trouble being aggressive enough, fast enough.
  10. This won’t work in a confined space or against a wall. Your back has nowhere to go. The technique calls for ‘full retreat’ while shooting from the hip and leaning back. We live in a world of curbs, bumpers, bollards, and walls. That means tripping.

“What Do You Advocate Then, smartass?”

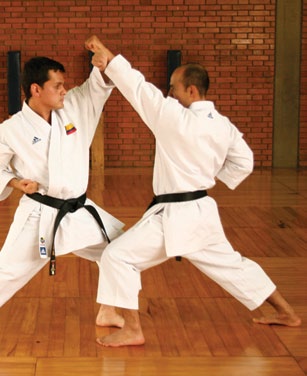
  1. I learned these principles from the Shiv-Works collective. Craig Douglas, Paul Sharp, Cecil Burch, Chris Fry, and Larry Lindenman. I have seen versions of the same postural cues and retention shooting from Active Response Training, Tactical Response, and a boatload of other schools and books. The good technique is so prevalent that I find it hard to believe the speed rock is still a thing, hence the post.
  2. If we make it our mission to try to stay upright, stay mobile, and most importantly, stay conscious, then we have a spring board to drive our technique.
  3. Adopt an athletic base. Hips low, nose-over-toes (weight on balls of feet), strong posture, aligned spine. Ready to deliver or receive forward drive.
  4. When you’re reacting to your adversary’s attack at this distance, it’s foolhardy to attempt to get your gun into play. You have to deal with his forward pressure and strikes/stabs FIRST.
  5. The less-than-ideal target zone of the hips and stomach serve to diminish our opponents ability to fight. As he soaks up rounds with no obvious recourse, his will to fight will fade, and you can improve your position and make more vital-area hits if required.
  6. The dropped elbow retention position is serviceable with good posture. Elbow retracted back as soon as you clear leather, forearm indexed along ribs, slight downward angle to shots. At least we know where they’ll land.

    Greg Ellifritz from Active Response Training demonstrating a retention position along with a fending off-side arm.
    Greg Ellifritz from Active Response Training demonstrating a tight retention position along with a fending off-side arm. Note downward angle of shots, forward posture, and no intersection of muzzle line with shooter’s body.
  7. I feel that an even more defensible and repeatable position exists. It’s simply the ‘count 2’ of the draw I prefer. Elbow retracted straight up and back, thumb flagged away from slide as a standoff, thumb indexed on the pectoral muscle, bunched tight trap muscle. This creates a repeatable downward angled shot path that won’t intersect in your other arm, which is probably fending or tied up with your adversary. It also works in the horizontal plane (read: on your back). Watch Craig Douglas work this position on the range. Video by Ballistic Radio.
  8. You might need to weather the initial storm of the attack. Learn a solid non-diagnostic default position to survive the first volley. Here’s a great article about options.

In Closing

These are the best methods I’ve seen and used in high pressure force-on-force training (which is as close as we can get to a gunfight without losing training partners). If you think I’m full of shit, I encourage you to get a bite guard, some MMA gloves, a blue gun, a buddy, and a grassy field and work it. If you’re near me, I’ll work it with you. Start slowly and ramp up the pressure until you have a competitive ‘gun-fight’ and see which method keeps you on your feet longer and absorbing fewer strikes. Test, refine, repeat.

Oh, and don’t believe everything you see on the internet.

Mark

If you find value in my posts, please consider subscribing and sharing. And please do your Amazon shopping through our affiliate link.


Technique: (Slide) Rack City, Rack Rack City

Though it might seem like minutia, and ultimately probably is, there is great debate in the firearms training community about how one should rack the slide of one’s pistol. The contention arises over the cost/benefits of each method with regards to speed, robustness, general applicability over wider set of circumstances, which pistol is used, left/right hand appropriate, fine/gross motor skills, hand strength, and a host of other points.

I have no intention of settling any debates. I want to show you several different methods and give you the pros and cons of each method. You’ll decide which to practice and implement.

As a general rule, all slide manipulations should be done in the 24″ or so sphere in front of our faces where we have extra dexterity, visual acuity, and where we can still see what is happening beyond the gun in the background.

Overhand Rack Behind Ejection Port

This one is the gold standard in many entry level (and advanced) fighting firearms training programs.

Pros:

  • This works on most guns for a wide array of issues that guns have. It works for a stoppages, for a reload at slide-lock or slide-forward if you happen to ride the slide stop lever.
  • Because it works for multiple problems, there’s less to think about. It’s more ROBUST.
  • It works when you’re muddy, bloody, sweaty because you get maximum skin contact on maximum slide grooves.
  • You can get a lot of racking force if your hands are weak by pulling with the slide hand, while punching with the gun hand. Creating force vectors in opposite directions.
  • Touted as ‘gross motor’ and easier to perform under stress because you grab a chunk of slide and then try to rip the slide off the gun. As opposed to hitting little buttons. (I take issue with that ‘gross motor’ argument, since the trigger and mag release are also little buttons we access under stress… but I digress.) Photo time!

Cons:

  • It’s demonstrably slower. Your hand has to move from the gun, to your chest, and back to the pistol to reestablish grip.
  • It can activate the safety on a slide-mounted-safety pistol (Berettas for instance)
  • Requires two hands

Slingshot Grip

This is the solution for slide-mounted safety guns.

Pros:

  • It really works on almost all semi-auto pistols.

Cons:

  • It requires more grip strength to pinch the slide with 2 fingers instead of the four finger clamp of your hand. When I was having grip issues a few years ago from chemotherapy, I couldn’t do this method.
  • Requires two hands.

C-Clamp Grip in front of Ejection Port

I saw Frank Proctor doing this method in a youtube clip. He talks about it in his ‘deliberate load’ video. Relevant info starts at 1:13

Pros:

  • It’s fast. Your hands only need to fold back together to a full firing grip
  • Can fix malfunctions and manipulate slide just like in the overhand and sling-shot method.
  • Allows good view of chamber for press-checking status of gun.

Cons:

  • The proximity of muzzle to shooters hand is a little close for comfort. I could see a non-dedicated person flagging themselves easily.
  • Requires a lot of hand strength. I DEFINITELY couldn’t do this method when I was grip-compromised. Forward cocking serrations are a plus.
  • Double action guns, where you must overcome the spring tension of the hammer, makes this technique a little more difficult. Try thumb-cocking the hammer before attempting this.
  • Requires two hands.

Slide-Stop/Release Button

I used to shun the use of the slide stop (or release) button to get the slide to go home after a slide-lock reload. I was being a Tactical Timmy. I was dumb. And slow.

Pros:

  • The fastest way to send the slide home from slide-lock
  • Can be done one-handed
  • Can be done with either strong or weak thumb (if you’re right handed) depending on your digit length.

Cons:

  • It’s only good for letting a locked slide go forward. It doesn’t solve any other pistol issues (stoppages, etc)
  • Some small framed guns with stiff recoil springs require an inordinate amount of thumb strength to release the slide with the button. My S&W shield is a culprit of this.
  • Left handed people will need to use their trigger finger for this. Or not at all. (H/T Steve W. for reminding me of lefties)

Off of a nearby surface

This is a method of necessity and extenuating circumstances. By catching the rear sight or ejection port on a nearby surface, you can safely run the slide. This is a last resort measure.

Pros:

  • Minimal hand strength required. All you need to do is catch a surface with your gun, and lean on it. Your body weight and gravity are on your side. This was literally my ONLY recourse for running a slide when I was at my weakest in early 2015.
  • Only needs one hand
  • Any Surface will do. e.g. Belt, Holster, Car Door, Table, Face of scumbag you’re shooting, etc.

Cons:

  • Benefits from a flat ledge on the rear sight to get good purchase on your chosen surface.
  • Muzzle direction can be an issue if you’re not careful. (Down and Away when racking off of your body/gear)
  • Possibility of malfunction if you don’t keep ejection port clear when performing.

Conclusion

While it really shouldn’t make a difference for your practice, I generally prefer the slingshot method for most slide manipulations when the slide is forward, the Proctor c-clamp method when press-checking the status of my gun, and the slide release/stop button for slide-lock reloads. But don’t take my word for it. Test it for yourself. Both on a timer, and then after many many repetitions under varying conditions to see how high percentage it is. If your preferred method works only 60% of the time, but it’s faster than another method that works 95% of the time, I’d probably go with the higher percentage move. But that’s me. I’m risk averse.

Thanks for reading.

Mark L.

If you find value in my ramblings, please subscribe, share, and shop through our amazon affiliate link.

Gear Featured:
Surefire X300U
Ameriglo .130 fiber front/ .130 black rear
Do The Work/Memento Mori Bracelet
Silicone Wedding Bands
Marathon TSAR watch
Glock 19
Beretta PX4C


Shooting Technique: One Handed Shooting, Canted or Vertical?

This is a short post about pistol shooting technique. One of my readers noticed that I was using a traditional strict vertical one handed shooting technique. Like most things, it’s been a work in progress. Here’s my reasoning for using a more traditional vertical hold instead of a more canted ‘high speed’ one handed technique.

I was taught during my first firearms class (Fighting Pistol – Tactical Response) that a good way to shoot one handed (strong hand) was have the slide of the gun canted slightly inboard while shooting. Think of throwing a cross in boxing. The hand is unwinding and the fist is about 15 degrees from vertical. It definitely feels more natural and is more comfortable to do this. It also can be pretty repeatable as you ride the recoil between shots, though I feel like I have to steer the gun a bit to get it to return to my original point of aim. More so the larger the caliber gets (physics, duh). The shot impulse is absorbed in the shoulder and triceps.

Strong Side Canted

Within the last two years, based on recommendations from The Tactical Professor I started trying the more traditional ‘up and down’ slide when one handed shooting. It has definitely felt more stable and the gun cycles in a more predictable path, requiring less ‘muscling’ of the gun during recoil. It also is more congruent with my method of pressing the gun out after the retention position of my draw stroke. The muzzle comes horizontal and under the dominant eye early and rises up and out from there. The engineer in me was curious why this method seems to feel more stable.

Vertical one handed shooting.

I was reading Becoming a Supple Leopard which is a fantastic book about bio-mechanics as they relate to functional movement and sports. The part that grabbed my attention was regarding the shoulder and creating stability in the shoulder joint and I had sort of an epiphany.

Full vertical at Rogers Shooting School

The best way to tie the shoulder and humerus together is to externally rotate the humerus, thus winding up the ligaments of the shoulder. Kelly Starrett demos this by winding a rag around the end of a mop handle, which is a good visual. The more you rotate the broom, the tighter the rag gets. This is why we try to ‘bend the bar’ during bench press. This protects and stabilizes the shoulder. So my thinking is that the winding up of the shoulder ties the arm to the torso and stiffens that connection to remove degrees of freedom from the recoil impulse. This makes for a more repeatable recoil path.

It also happens to be a more traditional way to shoot one handed (as you probably know). I haven’t made my mind up on my favorite method. I tend to lean towards the vertical method, even though it bucks the current fashion of a ‘half gansta’ type hold. The true test is to put both on a timer and let the data speak for itself, which I admit I haven’t done. This is a subtle and probably trivial thing, but it’s the kind of thing that keeps me interested.

Your Grandfather shot Nazis like this.

Note: For weak handed shooting, a slight cant is needed to bring the sights across to the dominant eye.

Remember, this isn’t THE way, only A way. You get to make the decision for yourself, which is nice.

What’s your favorite technique?

Why?

I seriously am curious. Let me know what you do and why. Thanks for reading.

Protect the Brood,
Defensive Daddy

The Universal Draw Stroke

“The Draw Stroke is the Draw Stroke is the Draw Stroke.”

-Paul Gomez explaining the drawstroke from several unorthodox positions

Paul Gomez, the personal protection integrator who passed away well before this time, once said that simple phrase that has stuck with me ever since. He was good about quips that you would have to contemplate and reflect on. At the time, the realities of self-defense and ‘The Fight’ were starting to become clearer to me. I realized that if I had to use my gun, I wouldn’t be slapping iron at noon in a dusty street while the town folk were watching from the front of the saloon (Insert your own personal gunfight fantasy).

Skin that Smoke wagon!

Upon watching and reading about the dynamics, lighting conditions, circumstances, terrain, distances, number of criminals, and locations in defensive shootings (gun fights, or gun battles) there was only one thing that was consistent. This is that the good guy didn’t get to choose when it went down. We, as the reactionary party, are attacked when it’s the worst possible time for us, and the best possible time for them.

As I wrote about in practice by the odds, a person should spend most of their time/resource constrained practice time working the most likely needed skill sets and streamline their mechanics to cover the widest set of circumstances one possibly can.

Your gunfight (hopefully we get lucky enough to make it a shooting instead) might be at thirty feet in a parking deck, at arms range in bank, in the hallway outside of your child’s room, in the front seat of your car, or on your back next to an ATM. So how can we as responsible and thinking gun owners, try to account for as MANY of these scenarios as possible with one set of mechanics for getting our gun into play? We can’t try to do something different for each scenario and have a different way to get the gun into play for each one. The decision tree quickly branches into an unmanageable (and slow) pile of options. The method of ‘if this, then this’ is why certain martial arts fall apart under pressure.

When I punch like this, you block like that… No higher.. a little left… OK perfect.

So we need a draw stroke that works within as many of the scenarios as we can imagine. We need an ‘if anything happens, you only need this one movement’ type of thing. Luckily for me, there are guys like Gomez, Craig Douglas, Greg Ellifritz, Cecil Burch, Chris Fry, James Yeager, Paul Sharp, Larry Lindenman, Aaron Little, and all of the gentlemen and scholars that teach a robust universal draw stroke and it’s integration into a self defense program.

The universal draw-stroke is so useful because with one mechanic we can handle probably 99% of all scenarios that one could imagine. It works while standing, lying, seated, while grappling, in a competition, from appendix or behind the hip, in a retention position, whatever you’ve got.


The Steps

  1.  Clear obstructions which could foul building a full (fuckin’) firing grip. This one can be deceptively complicated. In the simplest case with an open top holster in a shooting range, you can actually skip this step completely. Slightly more complicated might be breaking holster retention devices or clearing concealment garments. If seated, you might have to clear garments and a seat belt. If you’re in a fouled up tangle (gun grapple) of arms and legs, it might mean doing an arm drag and controlling the nearest arm to the gun. This step has the most depth of any of the parts of the draw-stroke. You can go deep deep deep into training all the complications that this one step can cause.
  2. Establish a full firing grip. Building the grip with all of the proper index points is key. This is the first, and probably last time in your fight that you’ll have to build a good grip. Get a lot of practice and make it count.
  3. Begin an efficient (no wasted movement) draw in which the gun is never lower than it was a moment before. Keep your elbows from tracking away from your torso. Being in proximity to non-involved parties that you don’t want to hang up on while drawing and opening holes between your arms and your torso for the bad guy to control your arms being the primary reasons.
  4. Move to an indexed position of retention. This is important because you may need to shoot with someone in contact with you, swinging a pipewrench, or otherwise in your intimate space. If you need to shoot from here, you can stop your draw and begin shooting.
  5. Move the gun to a horizontal position under the dominant eye. Your hands can come together at this point. Or for one handed shooting, you can begin pressing the gun out to full extension. While the gun is coming out, you should be bringing the gun into the eye-target line as quickly as possible. This gives you time to refine your sight picture as you are reaching full extension, which will allow you to start shooting quicker.

Example Photos:

Gun behind the hip.
Gun behind the hip.
IPhone Photos Dump3
With ‘appendix’ carry, the retention position is a small diversion from the straight line draw. It’s easy to fall into the retention position as needed, however. My body is a bit more bladed than I intended in that photo. Ideally, I’d be more square to the target.
IPhone Photos Dump
Clear seat-belt, clear garment, draw as needed.
IPhone Photos Dump2
Grounded
Collages4
Standing grapple

In Closing

I think spending the time to drill and ingrain this draw-stroke is time well spent. Having the framework to shoot from different positions without having to think about the mechanics is crucial. You’ll have enough other things to think about. When learning this draw, you should seek training under a watchful eye so you learn all the nuance involved. When you’re drilling and learning this draw, strive for perfect repetitions. Try to hit all of the index points so you will have the kinestetic awareness of how your body feels and where it is in space. I would pause at each way point along the way, imagining myself as a robot moving perfectly.

What you’ll probably find is that when you’re going for supreme speed in a competition or when you know you’re shooting at distance, the sharp corners of your draw will ’round’ and you’ll move in a more direct path to the target. That’s OK. You’re a thinking being and you will know when it’s appropriate. Having a framework to fall back on is what matters here. One Draw Stroke to rule them all… or something.

Getting Training

Here’s a list, in no particular order, of some trainers who can teach you this stuff: